LiftMaster Wall Control Manual: A Comprehensive Guide
Navigating the world of LiftMaster garage door access requires understanding your wall control’s features‚ troubleshooting potential issues‚ and ensuring optimal security.
Recent discussions highlight concerns regarding shipping and tracking of valuable items‚ like vintage baseball cards‚ mirroring the need for reliable access control.
From auction updates ending November 30th to sales of 1989 Upper Deck wax boxes‚ the demand for secure transactions is evident‚ emphasizing the importance of a functioning wall control.
The need for tracking and protection during shipping parallels the security features offered by LiftMaster‚ such as the lock and vacation modes.
Understanding Your LiftMaster Wall Control
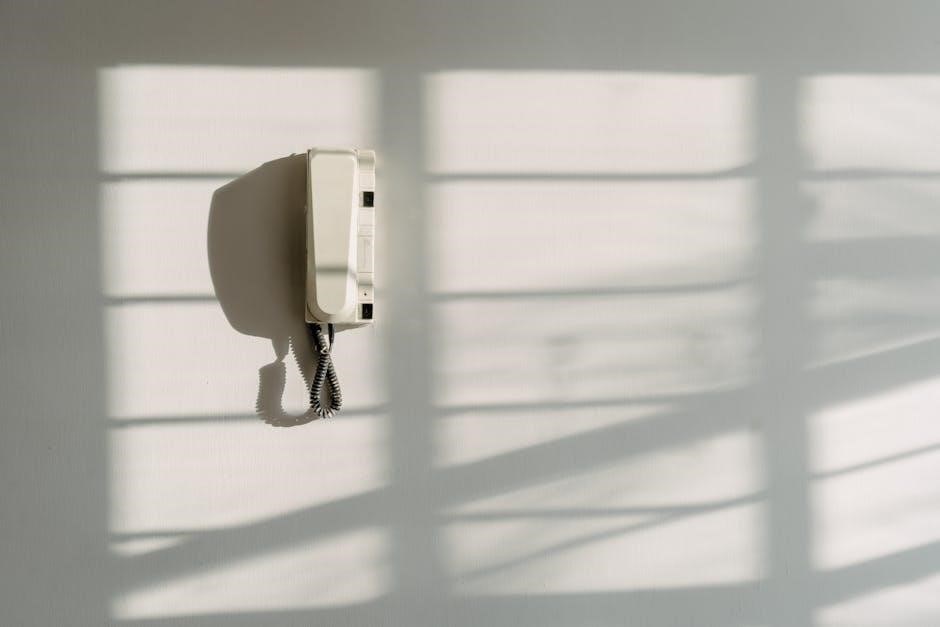
Your LiftMaster wall control serves as a convenient‚ interior method for operating your garage door‚ offering a reliable alternative to keypads or remote controls. It’s a crucial component of your garage door system‚ designed for ease of use and enhanced security.
Recent online discussions about secure transactions and tracking‚ particularly concerning valuable collectibles like vintage baseball cards‚ highlight the importance of a dependable access point. Just as careful shipping practices protect valuable items‚ your wall control safeguards your garage’s access.
The control panel typically features buttons for ‘Open‚’ ‘Close‚’ and often a ‘Stop’ function. Understanding these basic operations is fundamental. The light control settings‚ a more advanced feature‚ allow you to manage garage lighting directly from the wall. Like ensuring proper packaging for shipped goods‚ understanding your wall control’s functions ensures smooth operation and prevents potential issues. Regularly checking its functionality‚ similar to tracking a shipment‚ is key to maintaining a secure and convenient garage access system.
Identifying Different LiftMaster Wall Control Models
LiftMaster offers a variety of wall control models‚ each with slightly different features and aesthetics. Identifying your specific model is crucial for accessing the correct programming instructions and troubleshooting guides.
Similar to recognizing different collectible card series – like the 1964 Jay Publishing Twins set mentioned in recent online auctions – each LiftMaster model has unique characteristics. Common models include those with basic up/down buttons‚ and more advanced versions featuring a learning code function or integrated light controls.
Look for a model number typically located on the back of the control panel. This number is key to finding specific documentation. Just as knowing the year and set of a baseball card impacts its value‚ knowing your wall control model ensures you’re using the correct resources. Online forums and LiftMaster’s official website are valuable resources for identification‚ mirroring the communities dedicated to identifying and valuing collectibles.
Basic Operation: Opening and Closing Your Garage Door
The fundamental function of your LiftMaster wall control is to remotely operate your garage door. Typically‚ a single press of the “Up” button initiates the door’s opening sequence‚ while a press of the “Down” button closes it.
This operation mirrors the straightforward nature of participating in online auctions‚ like those for vintage baseball cards‚ where a single click can initiate a bid. However‚ safety is paramount. Always ensure the garage door is fully open or closed before releasing the button‚ and maintain a clear path for the door’s movement.
Pay attention to the indicator light on the control panel; it often signals activity or potential issues. Just as tracking information confirms a shipped item’s progress‚ the light provides feedback on the door’s status. Never attempt to operate the door if the safety sensors are compromised‚ as this could lead to damage or injury.
Programming a New Wall Control
Adding a new LiftMaster wall control requires establishing a secure connection between the device and your garage door opener. This process typically involves accessing the “Learn” button on your opener unit – consult your opener’s manual for its exact location.
Once activated‚ you’ll usually press and hold the program button on the wall control itself until an indicator light confirms successful programming‚ similar to confirming a successful bid in an online auction. This establishes a unique code‚ ensuring only authorized devices can operate the door.
Just as careful packaging protects valuable baseball cards during shipping‚ proper programming safeguards your garage’s security. If programming fails‚ repeat the process‚ ensuring no other devices are interfering. Refer to the LiftMaster website or customer support for model-specific instructions.
Replacing Batteries in Your Wall Control
Maintaining a functional LiftMaster wall control often begins with ensuring fresh batteries. A weak battery can lead to intermittent operation or complete failure‚ much like a lost tracking notification for a shipped item. Typically‚ these controls utilize standard alkaline batteries – check your model’s specifications for the correct type.
To replace them‚ carefully open the wall control casing‚ usually by gently prying it open with a small screwdriver. Remove the old batteries and install new ones‚ observing the correct polarity (+ and -). Securely close the casing‚ ensuring a snug fit to protect the internal components.
Just as protecting valuable cards during shipping is crucial‚ safeguarding the wall control’s battery compartment prevents corrosion and ensures reliable performance. Test the control after replacement to confirm proper operation.
Troubleshooting Common Issues
When your LiftMaster wall control malfunctions‚ systematic troubleshooting is key. Similar to investigating a missing mail search request‚ start with the simplest solutions. First‚ verify the batteries are fresh‚ as a weak power source is a frequent culprit. Next‚ check for any physical obstructions blocking the signal path between the control and the garage door opener.
If the issue persists‚ consider potential interference from other devices‚ mirroring concerns about sorting machines damaging shipped cards. Temporarily disable nearby electronics to see if this resolves the problem. Ensure the safety sensors are properly aligned and unobstructed‚ as these are critical for operation.
Finally‚ consult the LiftMaster documentation or online resources for model-specific troubleshooting steps. A methodical approach‚ like tracking a package‚ will often pinpoint the cause.
Wall Control Not Responding
A non-responsive LiftMaster wall control can be frustrating‚ but several checks can restore functionality. Begin by verifying the battery level; depleted batteries are a common cause‚ much like a package lacking tracking information. Next‚ ensure there are no physical obstructions between the wall control and the garage door opener’s receiver.
Consider potential radio frequency interference‚ similar to concerns about sorting machines damaging collectible cards. Temporarily disable nearby devices to rule this out. Confirm the garage door opener itself is receiving power and hasn’t tripped a breaker. If the opener is functioning‚ attempt to reprogram the wall control‚ following the manufacturer’s instructions.
If issues persist‚ a factory reset might be necessary‚ but remember to re-program afterward.
Garage Door Opens/Closes Partially
When a LiftMaster garage door only opens or closes partially‚ safety sensors are the first area to investigate. Ensure these sensors‚ crucial for preventing accidents‚ are aligned and free from obstructions – a blocked sensor is akin to a package lost in transit without tracking. Check for any debris or dirt on the sensor lenses‚ as this can interfere with the signal.
Next‚ examine the garage door’s tracks for any bends or obstructions that might impede its movement. Verify the spring tension is adequate; a weakening spring can cause incomplete operation. If the issue persists‚ the limit settings on the garage door opener may require adjustment‚ restricting the door’s travel.
Consult the manual for specific instructions on adjusting these settings‚ ensuring smooth and complete operation.
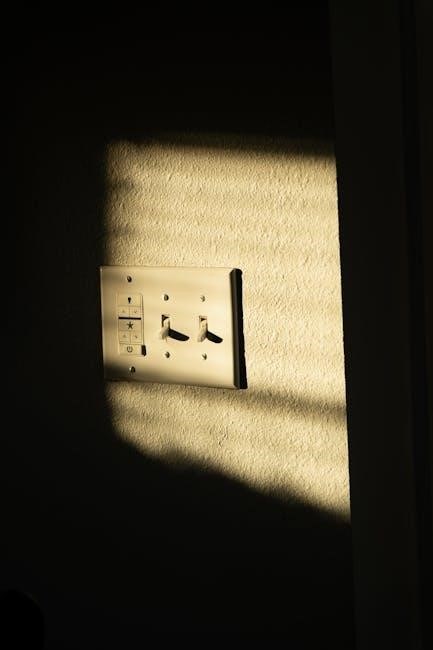
Wall Control Light Flashing
A flashing light on your LiftMaster wall control often indicates a diagnostic code‚ signaling a potential issue with the system. Much like tracking notifications alerting you to a package’s status‚ the flashing light communicates a problem needing attention. The specific pattern of the flashes – slow‚ fast‚ or a combination – corresponds to a particular error.
Consult your LiftMaster manual to decipher the code. Common causes include safety sensor misalignment‚ a limit switch issue‚ or a problem with the motor itself. Before attempting repairs‚ ensure the power to the opener is disconnected for safety.
If the problem persists after checking basic connections and safety features‚ contacting LiftMaster customer support is recommended for professional assistance‚ similar to seeking help with a lost shipment.
Interference with Other Devices
Like the potential for shipping disruptions affecting valuable collectibles‚ your LiftMaster wall control can experience interference from other electronic devices. This interference can manifest as erratic behavior‚ reduced range‚ or even complete non-responsiveness. Common culprits include wireless routers‚ baby monitors‚ and even certain types of lighting.
These devices operate on similar radio frequencies‚ creating signal clashes. To mitigate this‚ try repositioning your router or other potential sources of interference. Consider changing the router’s wireless channel. If the issue persists‚ a LiftMaster signal repeater can boost the signal strength and overcome interference‚ much like ensuring proper packaging protects items during transit.

Regularly testing your wall control’s functionality can help identify and address interference issues promptly.
Advanced Features & Programming
Beyond basic operation‚ your LiftMaster wall control offers advanced features enhancing security and convenience‚ mirroring the careful handling required for valuable collectibles. The lock feature prevents operation from the wall control‚ safeguarding against unauthorized access – similar to secure shipping practices.
Vacation mode further elevates security by disabling remote access‚ providing peace of mind while away. Programming additional wall controls is straightforward‚ allowing multiple access points. Light control settings enable customization of the wall control’s illumination‚ improving visibility and aesthetics.
Explore these features through your opener’s manual or the LiftMaster website. Remember‚ just as tracking a shipment is crucial‚ understanding these advanced features maximizes your garage door system’s potential.
Lock Feature: Securing Your Garage
The LiftMaster wall control’s lock feature provides an essential layer of security‚ preventing operation from the wall-mounted device itself. This is particularly useful when you want to disable access via the wall control while still retaining functionality through remote controls or the MyQ app.
Activating the lock feature effectively renders the wall control inoperable‚ safeguarding against unauthorized entry – much like carefully packaging valuable collectibles for secure shipment. It’s ideal when you’re expecting visitors or during extended absences.
Refer to your specific model’s manual for detailed instructions on activating and deactivating the lock function. Remember‚ consistent security measures‚ like utilizing the lock feature‚ are vital for protecting your property.

Vacation Mode: Enhanced Security When Away
LiftMaster’s Vacation Mode significantly enhances garage security during prolonged absences‚ mirroring the care taken when shipping valuable items like vintage baseball cards. When activated‚ the garage door opener disables remote controls and the MyQ app access‚ allowing operation only from the wall control.
This prevents unauthorized access via lost or stolen remotes or compromised online accounts. It’s a crucial feature for peace of mind while traveling‚ offering a robust defense against potential intrusions.
However‚ remember that Vacation Mode requires a functioning wall control. Regularly test its operation before departure. Like tracking a shipment‚ verifying functionality ensures your security measures are effective. Consult your model’s manual for specific activation instructions.
Light Control Settings
LiftMaster wall controls often incorporate adjustable light settings‚ offering convenience and enhanced security‚ much like ensuring proper packaging for valuable collectibles. These settings typically allow you to control the duration the garage door opener’s light remains illuminated after activation.
You can often adjust the light to stay on for a pre-set time‚ turn on with door operation‚ or remain on continuously. This is particularly useful for illuminating the garage during entry and exit‚ improving visibility and safety.
Some models even offer dimming capabilities. Refer to your specific model’s manual for detailed instructions on accessing and modifying these settings. Proper light control contributes to both functionality and security‚ similar to tracking a package to confirm its safe arrival.
Multiple Wall Controls: Programming Additional Units
Many LiftMaster systems support multiple wall controls‚ offering convenient access points throughout your home‚ akin to having multiple avenues for secure transactions. Programming additional units typically involves entering a “learning mode” on your garage door opener.
This process usually requires pressing a dedicated “Learn” button on the opener motor unit‚ followed by pressing the button on the new wall control. The opener then recognizes and accepts the new remote as authorized. Refer to your opener’s manual for the precise sequence‚ as it can vary between models.
Ensure each wall control is programmed distinctly to avoid interference. Like tracking multiple shipments‚ each control needs a unique identifier. Remember to test each unit after programming to confirm functionality.
Compatibility & System Requirements
Ensuring compatibility between your LiftMaster wall control and garage door opener is crucial for seamless operation‚ much like verifying shipping requirements for valuable collectibles. Not all wall controls are universally compatible; specific models are designed to work with certain opener series.
Generally‚ newer wall controls are backward compatible with older openers‚ but it’s always best to confirm using LiftMaster’s compatibility charts or by contacting customer support. Key system requirements include a functioning safety sensor system – a non-negotiable for safe operation.
The opener must be able to recognize the rolling code technology used by the wall control. Like needing tracking for shipped cards‚ the opener needs to ‘recognize’ the control. Verify your opener’s model number before purchasing a replacement or additional wall control.
Compatibility with Different LiftMaster Garage Door Openers
LiftMaster offers a diverse range of garage door openers‚ and wall control compatibility varies significantly between series‚ mirroring the diverse range of collectible card types. Older openers‚ like those from the 1960s and 70s‚ utilize different technology than modern models.
Generally‚ wall controls designed for Security+ 2.0 openers are not compatible with older openers lacking rolling code capabilities. Newer models‚ such as those utilizing MyQ technology‚ often require specific wall controls to unlock advanced features. Checking compatibility is as important as ensuring proper packaging for shipping valuable cards.
LiftMaster’s website provides detailed compatibility charts‚ allowing users to input their opener’s model number to identify compatible wall controls. When upgrading‚ consider the features you need and choose a control designed for your specific opener series.
Checking Your Opener’s Compatibility
Determining your LiftMaster garage door opener’s compatibility with a new wall control is crucial for seamless operation‚ much like verifying card conditions before an auction. The most reliable method is locating the model number.
This number is typically found on a sticker affixed to the opener’s motor unit‚ often inside the light cover. Once you have the model number‚ consult LiftMaster’s official website or the user manual. These resources provide compatibility charts detailing which wall controls are supported.
Pay close attention to the technology used by your opener – Security+‚ Security+ 2.0‚ or MyQ. Controls designed for one technology won’t function with another. Similar to tracking packages‚ verifying compatibility prevents frustration and ensures a secure connection.
Required Safety Sensors
LiftMaster garage door openers are equipped with essential safety sensors designed to prevent accidents‚ mirroring the care taken when shipping valuable collectibles. These sensors‚ often called photo-eyes‚ are located near the floor on either side of the garage door opening.
Their function is to create an invisible beam. If this beam is interrupted by an object – a person‚ pet‚ or vehicle – the door will automatically stop closing and reverse direction. Proper alignment and functionality of these sensors are non-negotiable for safe operation.
Regularly inspect the sensors for obstructions‚ dirt‚ or damage. Like tracking a package‚ consistent monitoring ensures everything functions as intended. A flashing light on the sensors indicates a problem requiring immediate attention. Ignoring these warnings can compromise safety.
Safety Precautions
Prioritizing safety when operating your LiftMaster garage door is paramount‚ much like protecting valuable collectibles during shipment. Never allow children to play near the garage door or operate the wall control. Keep the area clear of obstructions‚ ensuring the safety sensors have an unobstructed view.
Regularly test the safety features – the auto-reverse function and the safety sensors – to confirm they are working correctly. This proactive approach‚ similar to tracking a package‚ prevents potential issues.
Never run the garage door while it is obstructed. Avoid attempting to defeat or disable the safety features. Always visually confirm the door is fully open or closed before proceeding. Remember‚ a functioning system is a safe system‚ and vigilance is key.
Importance of Safety Sensors
LiftMaster garage door safety sensors are critical safety devices‚ functioning as a vital protective measure‚ much like tracking a valuable shipment to ensure its safe arrival. These sensors utilize an infrared beam to detect obstructions in the door’s path.
If the beam is broken – by a person‚ object‚ or even debris – the door will automatically stop and reverse‚ preventing potential injury or damage. Regularly inspect the sensors for dirt‚ debris‚ or misalignment‚ as these can impair their function.
Never bypass or disable these sensors. Their proper operation is non-negotiable for safe garage door operation. Think of them as a crucial layer of security‚ safeguarding your family and property‚ mirroring the care taken with collectible cards.
Regular Testing of Safety Features
Consistent testing of your LiftMaster’s safety features is paramount‚ akin to verifying tracking information for a shipped item to confirm its protection during transit. Monthly testing ensures continued reliable operation.
To test‚ place a tall object (like a 2×4 piece of wood) in the door’s path and activate the closing function using the wall control. The door should immediately stop and reverse. Repeat this test with both safety sensors.
Also‚ test the safety reverse feature by manually pulling on the door while it’s closing. It should halt immediately. This proactive approach‚ like carefully packaging collectibles‚ prevents accidents and ensures peace of mind. Don’t assume they’re working; verify they are!
Avoiding Damage to the Wall Control
Protecting your LiftMaster wall control from damage is crucial for consistent operation‚ much like carefully packaging valuable collectibles to prevent damage during shipping. Avoid exposing the control to excessive moisture or extreme temperatures.
Do not subject the device to strong impacts or forceful button presses. Gentle operation extends its lifespan. Keep the area around the wall control clear of obstructions that could lead to accidental bumps or drops.
Regularly wipe the surface with a soft‚ dry cloth to remove dust and debris. Avoid using harsh chemicals or abrasive cleaners. Like tracking a package‚ preventative care minimizes potential issues and ensures reliable access. Treat it with care‚ and it will serve you well!
Resetting Your Wall Control
Resetting your LiftMaster wall control can resolve various operational issues‚ similar to initiating a “Missing Mail Search” when encountering delivery problems. Before attempting a reset‚ ensure you have access to your garage door opener and understand the programming procedure.
A factory reset will erase all programmed settings‚ requiring you to re-pair the control with your opener. Consult your opener’s manual for specific reset instructions‚ as procedures vary by model.
After a reset‚ follow the programming steps outlined in the manual to re-establish communication. This process is akin to re-establishing tracking on a shipped item. Be patient and methodical‚ and double-check each step to ensure successful programming. A successful reset restores functionality.
Factory Reset Procedure
Performing a factory reset on your LiftMaster wall control returns it to its original‚ out-of-the-box state‚ much like starting a fresh “Missing Mail Search” request. This erases all existing programming‚ including pairings with your garage door opener and any customized settings.
Typically‚ the procedure involves disconnecting the wall control’s power source – either by removing the batteries or disconnecting it from the power outlet. Then‚ a specific button combination must be pressed and held for a designated duration‚ often 10-20 seconds.
Refer to your specific model’s manual for the exact button sequence and timing. After releasing the buttons‚ the wall control’s indicator light may flash‚ confirming the reset. Re-programming is then essential‚ mirroring the need to re-enable tracking after a search.
Re-Programming After a Reset
Following a factory reset‚ your LiftMaster wall control requires complete re-programming‚ similar to establishing new shipping protocols with tracking for valuable collectibles. This process re-establishes the communication link between the wall control and your garage door opener.
Begin by entering learning mode on your garage door opener – consult your opener’s manual for specific instructions; Then‚ activate the desired button on the wall control‚ typically by pressing and holding it until the opener’s light flashes. This “pairs” the control with the opener‚ much like securing a transaction in an online auction.
Repeat this process for each button on the wall control. Test each button thoroughly to ensure proper functionality‚ verifying secure access‚ just as one would confirm card protection during shipment.
Where to Find Additional Resources
Beyond this guide‚ numerous resources are available to support your LiftMaster wall control experience‚ mirroring the online communities dedicated to vintage baseball card collecting and trading. The LiftMaster Official Website provides comprehensive documentation‚ FAQs‚ and downloadable manuals for various models.
For peer-to-peer support and troubleshooting‚ explore Online Support Forums & Communities. These platforms allow users to share experiences‚ solutions‚ and insights‚ similar to discussions about shipping practices and auction updates.
If you require direct assistance‚ Contacting LiftMaster Customer Support is a valuable option. Their dedicated team can address specific concerns and provide tailored guidance. Remember‚ just as tracking information is crucial for shipped items‚ these resources ensure a smooth LiftMaster experience.
LiftMaster Official Website
The LiftMaster Official Website serves as the primary hub for all things related to your garage door opener and wall control system‚ akin to a central auction site for vintage baseball cards. Here‚ you’ll find a wealth of information specifically tailored to your product‚ including detailed manuals for various wall control models.
Access comprehensive troubleshooting guides to resolve common issues‚ and explore FAQs addressing frequently asked questions. The website also offers parts diagrams and the ability to register your product for warranty purposes.
Similar to tracking a shipped package‚ the website provides resources to monitor and maintain your system’s performance. It’s a reliable source for updates‚ safety information‚ and direct contact with LiftMaster support‚ ensuring a secure and functional garage door experience.
Online Support Forums & Communities
Beyond the official LiftMaster website‚ a vibrant network of online support forums and communities offers invaluable assistance with your wall control manual and troubleshooting. These platforms‚ much like online auction discussions‚ provide a space for users to share experiences‚ ask questions‚ and offer solutions.
Dedicated forums often feature threads specifically addressing LiftMaster products‚ allowing you to search for answers related to your model. You can connect with experienced users who have encountered similar issues‚ mirroring the advice found in baseball card collecting communities.
These communities are excellent resources for gaining insights into advanced features‚ programming tips‚ and potential compatibility concerns. Remember to exercise caution and verify information before implementing any changes‚ ensuring a safe and secure garage door system.
Contacting LiftMaster Customer Support
When online resources and troubleshooting steps prove insufficient‚ direct contact with LiftMaster Customer Support is crucial for resolving complex wall control issues. Similar to seeking assistance with a valuable collectible‚ professional guidance ensures proper handling and avoids potential damage.
LiftMaster’s official website provides various contact options‚ including a dedicated phone line and email support. Be prepared to provide your wall control model number and a detailed description of the problem‚ mirroring the specificity needed when discussing auction items.
Their support team can offer personalized assistance‚ guide you through advanced programming procedures‚ and address safety concerns. Remember to document all interactions and retain any provided reference numbers for future follow-up. Prompt and effective support is vital for maintaining a secure and functional garage door system.